Properly assessing your attic’s insulation is a crucial step in maintaining energy efficiency and comfort in your home. Knowing how to measure attic insulation helps you determine if your current setup meets recommended standards or if upgrades are needed. This guide walks you through the process, offering practical tips and highlighting common pitfalls to avoid. Whether you’re planning a DIY project or preparing for a professional evaluation, understanding the basics can save you time and money.
For homeowners interested in broader energy-saving solutions, exploring solar roofing market trends can provide valuable insights into integrating insulation improvements with renewable energy upgrades.

Why Accurate Attic Insulation Measurement Matters
Measuring insulation in your attic isn’t just about numbers—it’s about ensuring your home retains heat in winter and stays cool in summer. Insufficient or uneven insulation can lead to higher energy bills, uncomfortable rooms, and even moisture issues. By accurately determining the depth and type of insulation, you can make informed decisions about upgrades or repairs.
Additionally, understanding the current state of your attic’s insulation is essential if you’re considering home improvements, such as installing solar panels or upgrading your roofing system. Proper insulation supports the performance of these enhancements and maximizes their benefits.
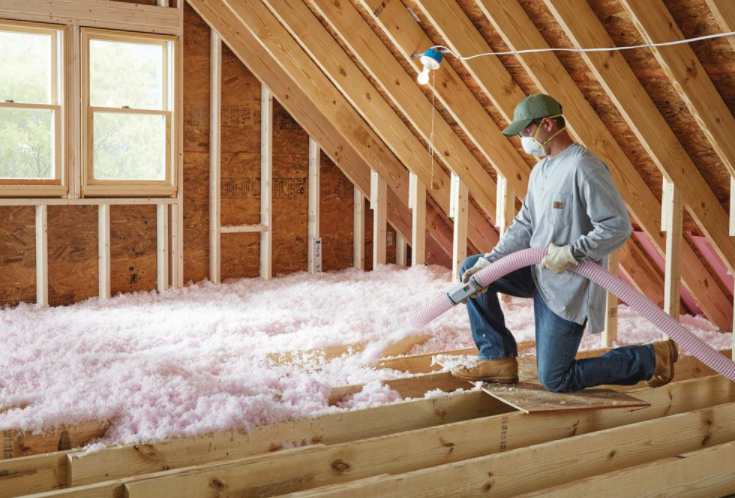
Essential Tools and Safety Precautions
Before starting, gather the necessary tools and take safety seriously. You’ll need:
- Measuring tape or ruler: For checking insulation depth.
- Flashlight or headlamp: Attics can be dimly lit.
- Protective gear: Gloves, dust mask, and long sleeves to avoid irritation from insulation fibers.
- Notepad or smartphone: To record measurements and observations.
Always step only on joists or walk boards to avoid damaging the ceiling below. If your attic is difficult to access or contains hazards like exposed wiring, consider consulting a professional.

Step-by-Step Guide to Assessing Insulation Thickness
The most common way to evaluate attic insulation is by measuring its depth in several locations. Here’s a straightforward process:
- Locate several spots throughout the attic, especially near the edges and center, to account for uneven distribution.
- Insert your measuring tape or ruler straight down through the insulation until it touches the attic floor or drywall. Avoid compressing the material, as this can give a false reading.
- Record the depth at each spot. Typical insulation types (fiberglass batts, blown-in cellulose, or spray foam) should be measured in inches.
- Calculate the average thickness by adding all measurements and dividing by the number of spots checked.
For most regions, the U.S. Department of Energy recommends attic insulation with an R-value between R-38 and R-60, which usually translates to 10–20 inches of material, depending on the type.
Understanding R-Value and Insulation Types
The R-value measures how well insulation resists heat flow. Different materials have different R-values per inch:
- Fiberglass batts: R-2.9 to R-3.8 per inch
- Blown-in cellulose: R-3.2 to R-3.8 per inch
- Spray foam: R-3.5 to R-6.5 per inch
To estimate your attic’s total R-value, multiply the measured depth by the R-value per inch of your insulation type. For example, 12 inches of fiberglass batts (at R-3.2 per inch) provides approximately R-38.4.
Common Mistakes When Checking Attic Insulation
Even with a clear process, there are pitfalls to avoid:
- Measuring only one spot: Insulation often settles unevenly. Always check multiple areas.
- Compressing insulation: Pressing down with your tool can reduce thickness and skew results.
- Ignoring insulation type: Different materials have different R-values, so depth alone isn’t enough.
- Overlooking air leaks: Gaps around vents, chimneys, or attic hatches can undermine even thick insulation.
Addressing these issues ensures your measurements reflect the true performance of your attic’s thermal barrier.
When to Upgrade or Add More Insulation
After measuring, compare your attic’s R-value to local building codes or energy recommendations. If your insulation falls short, or if you notice drafts, uneven temperatures, or high energy bills, it may be time to add more material or upgrade to a higher-performing type.
Upgrading insulation can also be a smart move when making other home improvements. For instance, if you’re researching innovations in solar roofing, ensuring your attic is well-insulated will help you maximize the benefits of new roofing technology.
Tips for DIY and Professional Insulation Assessments
Homeowners comfortable with basic tools can perform a simple insulation check themselves. However, if you encounter issues like mold, pests, or complex attic layouts, hiring a professional is wise. Experts can provide a detailed assessment, recommend the best insulation type, and ensure installation meets code requirements.
For those considering solar upgrades, a solar roofing site assessment often includes an evaluation of attic insulation, helping you plan comprehensive energy improvements.
Frequently Asked Questions
What is the best way to determine if my attic needs more insulation?
The most reliable method is to measure the depth of existing insulation in several locations and calculate the average. Compare this with recommended R-values for your region. If your attic’s insulation is below the suggested level, adding more can improve energy efficiency.
How often should attic insulation be checked?
It’s a good idea to inspect attic insulation every few years, especially after major weather events or home renovations. Regular checks help identify settling, moisture issues, or pest damage that can reduce effectiveness.
Can I add new insulation on top of old material?
In most cases, yes. As long as the existing insulation is dry and free of mold or pests, you can layer new material on top. However, avoid compressing the old insulation, as this reduces its R-value. If you’re unsure, consult a professional for guidance.