Improving your home’s energy efficiency often starts at the top—literally. Many older houses have insufficient or deteriorated attic insulation, leading to higher energy bills and uncomfortable indoor temperatures. Learning how to retrofit attic insulation can make a significant difference in both comfort and cost savings. Whether you’re dealing with drafty rooms, uneven heating, or simply want to boost your property’s value, upgrading the insulation in your attic is a practical and impactful home improvement project.
Before diving into the process, it’s important to understand the basics of attic insulation, the types of materials available, and the steps involved in a successful retrofit. This article covers essential considerations, step-by-step instructions, and key tips for a safe and effective upgrade. If you’re interested in related advancements, you might also want to explore solar roofing market trends for insights on integrating energy-saving technologies with your home improvements.

Why Upgrading Attic Insulation Matters
Many homes built before modern energy codes have inadequate or aging insulation in the attic. This can result in significant heat loss during winter and heat gain in summer, forcing your HVAC system to work harder. Retrofitting with new or additional insulation helps:
- Reduce energy consumption and lower utility bills
- Improve indoor comfort year-round
- Minimize drafts and cold spots
- Protect against moisture buildup and related issues
- Increase overall home value
Addressing insulation in the attic is often one of the most cost-effective upgrades for both older and newer homes.
Assessing Your Current Attic Insulation
Before starting any retrofit, it’s essential to evaluate the existing insulation. Look for the following:
- Type of insulation (batts, loose-fill, spray foam, etc.)
- Thickness and coverage—measure the depth in several locations
- Signs of moisture, mold, or pest damage
- Gaps, compressed areas, or missing sections
The recommended R-value (a measure of thermal resistance) varies by climate zone, but most attics should have between R-38 and R-60. If your insulation is well below this, or if you see bare spots, it’s time for an upgrade.

Choosing the Right Materials for a Retrofit
Several insulation types are suitable for attic retrofits. The best choice depends on your attic’s configuration, budget, and whether you plan to do the work yourself or hire a professional.
- Fiberglass batts or rolls: Widely available and easy to install, but require careful fitting to avoid gaps.
- Blown-in cellulose or fiberglass: Ideal for filling irregular spaces and adding insulation over existing material.
- Spray foam: Provides excellent air sealing and high R-value per inch, but usually requires professional installation.
When selecting materials, consider factors such as fire resistance, moisture tolerance, and compatibility with existing insulation. Always check local building codes for minimum requirements.
Preparing the Attic for New Insulation
Proper preparation is key to a successful retrofit. Follow these steps to get your attic ready:
- Clear the space: Remove stored items and debris to access all areas.
- Seal air leaks: Use caulk or spray foam to seal gaps around pipes, wiring, vents, and attic hatches. This step is crucial for maximizing the effectiveness of your new insulation.
- Check for moisture issues: Address any roof leaks, condensation, or signs of mold before adding insulation.
- Protect recessed lights and vents: Use approved covers or barriers to prevent insulation from contacting hot fixtures or blocking ventilation.
Taking time to address these issues will help ensure your new insulation performs as intended and lasts for years.
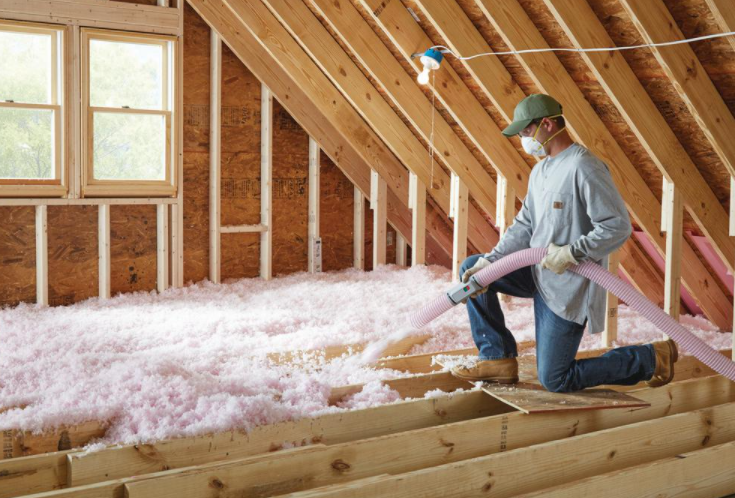
Step-by-Step Guide to Adding or Upgrading Attic Insulation
Once the attic is prepped, you can move forward with the installation. Here’s a general outline for retrofitting insulation:
- Lay down walk boards: If necessary, use sturdy boards to create safe walkways and avoid compressing insulation.
- Add insulation to bare spots: Fill in any missing or thin areas first, matching the type of existing material if possible.
- Install additional layers: For batts or rolls, lay them perpendicular to the existing layer to minimize gaps. For blown-in products, use a blower to evenly distribute material to the desired depth.
- Maintain ventilation: Ensure soffit and ridge vents remain clear to prevent moisture buildup.
- Check coverage: Use a ruler or depth gauge to confirm you’ve reached the recommended R-value throughout the attic.
Always wear appropriate protective gear, including gloves, a mask, and eye protection. If you’re unsure about any step, consider consulting a professional insulation contractor.
Common Mistakes to Avoid When Upgrading Attic Insulation
Even a well-intentioned retrofit can fall short if common pitfalls are not avoided. Watch out for these issues:
- Blocking attic ventilation, which can cause moisture problems
- Leaving air leaks unsealed, reducing the effectiveness of insulation
- Compressing insulation, which lowers its R-value
- Covering recessed lighting fixtures without proper barriers
- Ignoring signs of water damage or pests
Taking a careful, methodical approach will help you get the most benefit from your insulation upgrade.
Integrating Attic Insulation with Other Energy-Saving Upgrades
Retrofitting attic insulation is often just one part of a comprehensive energy efficiency strategy. Many homeowners pair this project with other improvements, such as air sealing, upgrading windows, or installing solar panels. If you’re interested in the latest advancements, check out resources on latest solar roofing technology and innovations in solar roofing to see how these upgrades can work together for maximum impact.
FAQ: Retrofitting Insulation in Attics
How do I know if my attic needs more insulation?
Signs include uneven temperatures in your home, high energy bills, visible joists or rafters, and insulation that is well below the recommended depth. Measuring the thickness and checking for gaps or compressed areas can help you decide if a retrofit is necessary.
Can I add new insulation over old insulation?
In most cases, yes. As long as the existing material is dry, free of mold, and not compacted, you can add new insulation on top. Avoid using vapor barriers between layers, as this can trap moisture.
Is it better to use blown-in or batt insulation for a retrofit?
Both options can be effective. Blown-in insulation is ideal for filling irregular spaces and covering existing material evenly, while batts are easier for DIY installations in open, accessible attics. The best choice depends on your attic’s layout and your comfort level with installation.
Should I hire a professional or can I do it myself?
Many homeowners can handle basic attic insulation upgrades, especially with batts or rolls. However, for spray foam, large attics, or if there are moisture or structural concerns, hiring a professional is recommended for safety and optimal results.
How long does it take to retrofit attic insulation?
The timeline depends on attic size, accessibility, and the type of insulation used. Most DIY projects can be completed in a weekend, while professional jobs may take a day or two.