Tackling the challenge of how to repair roof shingles can be daunting, yet incredibly rewarding for homeowners. Roof shingles are crucial in protecting your home from harsh weather, and keeping them in good condition is vital. Are you curious about the best way to approach this task? It’s here and it’s easier than you think! Lets dive into the big world of roof repair to give your home the protection it deserves.
Roof shingles not only enhance the curb appeal of your home but they play a crucial role in maintaining the safety and security of your dwelling. Over time, exposure to elements can cause damage, leading to leakage and other structural issues. Understanding how to repair roof shingles is key for maintaining a safe and dry home environment.

Why Repairing Roof Shingles is Necessary
Repairing roof shingles is an essential task to prevent weather damage and prolong the life span of your roof. With the right knowledge, homeowners can save on costly repairs and ensure their home remains safe and sound.
Getting Started: Identifying the Problem
Before you start any repair work, it’s crucial to identify what needs fixing. Common issues include cracked, curled, or missing shingles. Regular inspection can help you spot these problems early, ensuring timely repairs.
Signs of Damaged Roof Shingles
Keep an eye out for the following signs of damage: water leaks inside the home, visible cracks or curling of shingles, and missing granules. These signs suggest it’s time to learn how to repair roof shingles.
Tools You’ll Need
Before starting your project, gather these essential tools: a hammer, roofing nails, putty knife, utility knife, and a pry bar. Having the right tools will make the job smoother and more efficient.
Approved Step-by-Step Guide on How to Repair Roof Shingles
Step 1: Safety First
Always ensure you are working safely. Use a sturdy ladder and wear safety equipment. Remember, safety is the priority while working on roof repairs.
Step 2: Removing Damaged Shingles
Gently pry upwards under the damaged shingle using a putty knife to remove it without harming nearby shingles. Be careful not to damage the adhesive strip below.
Step 3: Preparing the Area
Make sure the area is clean and clear of debris. This helps ensure that the new shingles adhere properly, providing a long-lasting fix.
Step 4: Installing New Shingles
Slide the new shingle into place, aligning it correctly with existing shingles. Secure it using roofing nails, making sure each nail is flush with the shingle surface.
Step 5: Sealing and Cleaning
Apply roofing sealant under the edges of the new shingle to secure it and prevent leaks. Clean your work area to maintain your roofs appearance.
Tips for Maintaining Roof Shingles
Routine maintenance of roof shingles can prevent future problems. Simple actions like cleaning gutters and cutting back tree branches can make a significant difference.
When to Seek Professional Help
If youre ever in doubt about handling repairs on your own, or if the damage is extensive, its wise to consult a professional. Check out this roof replacement guide for insights.
Cost Considerations
Repairing shingles can be cost-effective compared to full replacements. If you’re curious about costs, read this article about how much a new roof costs.
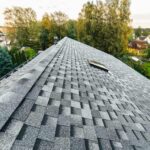
Different Types of Shingles
Understanding the type of shingles on your roof can assist in the repair and maintenance process. Whether you have asphalt or wood shingles, each type has specific repair techniques.
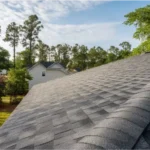
Asphalt Shingles
Known for their durability, asphalt shingles are common and relatively easy to repair thanks to their straightforward installation method.
Wood Shingles
These offer a natural appearance but may require more maintenance compared to other types. It’s crucial to be gentle during repairs to avoid splintering.
Environmentally Friendly Options
Consider using eco-friendly shingle materials for new installations or repairs. These not only benefit the environment but can improve your home’s energy efficiency.
Delighted Homeowners Share Their Success Stories
Many homeowners have tackled shingle repairs and are delighted with the results. Reading success stories can be motivating and offer practical insights.
Frequently Asked Questions
What should I do if I find a leak?
Address it immediately to prevent further damage. Locate the source and assess if you can perform a repair yourself or if professional help is needed.
How often should I inspect my roof?
Inspect your roof bi-annually and after severe weather events. Regular inspections help in catching potential issues early.
Can I repair roof shingles in the winter?
While it is possible, winter conditions can make repairs challenging. It is generally recommended to wait for milder weather for better adhesion and work conditions.

Conclusion: It’s Your Turn to Take Action
Now that you’re equipped with the knowledge on how to repair roof shingles, its time to take action. Ensure you follow the steps closely for a successful repair, protecting your investment and enhancing your homes safety. For more insights on choosing the right roofing materials, visit our roofing materials guide on our site.
This article contains affiliate links. We may earn a commission at no extra cost to you.