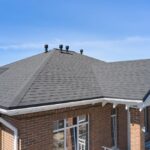
If you’re a homeowner experiencing issues with your roof, you might notice curled shingles appearing over time. These curled shingles can lead to significant problems if not addressed promptly. Learning how to fix curled shingles is essential in maintaining the integrity of your roof and, by extension, your entire home. In this article, we’ll guide you through the process of fixing them yourself, ensuring your roof remains in top shape without the need for immediate professional intervention.

Understanding Curled Shingles
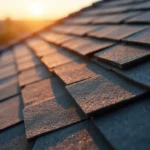
Before diving into the solutions, it’s important to understand why shingles curl in the first place. Exposure to harsh weather conditions, aging, and improper installation are common reasons. Addressing these root causes can prevent future curling and save you time and money.
Causes of Shingle Curling
Shingle curling could occur due to various factors, including poor attic ventilation, single-layer roofing, or simply aging materials. Identifying these causes is crucial for a permanent fix.
Prevention Techniques
Maintaining your roof can minimize the occurrence of curled shingles. Regular inspections, especially after a storm, can help detect issues early. Check out our guide on storm roof inspections for more details.
Regular Maintenance
Regular inspection and cleaning of your roof are preventive measures that can prolong the lifespan of your shingles. Consider adopting a maintenance routine before heavy weather seasons.
Step-by-Step Guide to Fix Curled Shingles
Heres how you can fix those curling shingles:
Tools and Materials Youll Need
Before starting, gather the necessary tools: a hammer, roofing nails, a ladder, sealant, and a putty knife.
Step 1: Safety First
Ensure you have a secure ladder and a harness if working on steep roofs. Safety should always come first.
Step 2: Prepare the Shingles
Lift the curled edges gently. Avoid breaking them, especially if theyre brittle due to age.
Step 3: Apply Roof Sealant
Use a generous amount of roof sealant under the curled section using a putty knife. Press the shingle firmly back into place.
Step 4: Secure with Roofing Nails
After applying the sealant, further secure the shingle with roofing nails. This ensures the shingle remains flat over time.
When to Seek Professional Help
There are instances where DIY might not be enough. If multiple shingles are curling, or if you notice signs of leaks, consider professional inspection. For tips on managing slow roof leaks, visit our detailed article.
Benefits of Professional Intervention
Professionals can provide a comprehensive assessment, ensuring there’s no underlying damage that needs addressing. They can also offer a longer-term solution that might not be feasible in a DIY approach.
Conclusion
Fixing curled shingles is a task within reach for many homeowners, with the right understanding and tools. It’s important to stay proactive about roof maintenance to prevent minor issues from becoming significant problems. Remember that safety is paramount in any DIY project. If you’re ever in doubt about tackling such tasks, professionals can always provide assistance. Additionally, for those interested in more extensive maintenance tips, consider exploring resources such as American Weather Star’s roofing tips.

FAQs
Why do shingles curl in the first place?
Shingles may curl due to aging, poor attic ventilation, or weather conditions. Identifying the cause is crucial for effective prevention and repair.
What happens if you don’t fix curled shingles?
Ignoring curled shingles can lead to leaks and further roof damage, increasing repair costs significantly. Addressing the issue promptly saves time and money.
Can I prevent shingle curling?
Yes, regular maintenance, proper attic ventilation, and addressing issues promptly can prevent curling. For additional preventive measures, consider learning about homemade cleaning solutions for your roof.
This article contains affiliate links. We may earn a commission at no extra cost to you.