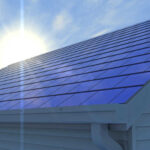
Welcome to a comprehensive guide on how to install drip edge on roof. The drip edge is a critical component in roofing, serving as a protective element that directs water away from the fascia and into the gutter. Proper installation of a drip edge can tremendously enhance the longevity and durability of your roof.

1. What is a Drip Edge?
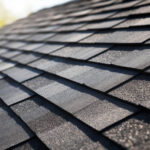
A drip edge is a metal flashing installed at the edges of your roof. Its main job is to manage water flow, preventing damage to your roof and the surrounding framework. It is typically made of aluminum, galvanized steel, or copper.
Types of Drip Edges
- Hemmed Drip Edge: Ideal for metal roofing systems.
- L-Style Drip Edge: Commonly used with shingle roofing.
- T-Style Drip Edge: Provides a smooth flow of water into the gutter.
2. Essential Tools for Installing Drip Edge
Before learning how to install drip edge on roof, gather the necessary tools. This preparation will make the installation process seamless and efficient.
- Measuring Tape
- Snips or Metal Shears
- Hammer or Roofing Nail Gun
- Flat Pry Bar
- Ladder
- Protective Gear
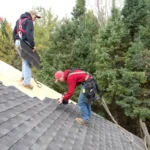
3. Step-by-Step Guide on How to Install Drip Edge on Roof
Step 1: Preparation
Start by inspecting your roof’s fascia and the area where the drip edge will be installed. Clear any debris and repair damages.
Step 2: Placing the Drip Edge
Place the drip edge flush with the roof’s edge, ensuring it is aligned properly. Starting at a corner, nail it in place every 12 to 24 inches using roofing nails.
Step 3: Cutting and Overlapping
Cut the drip edge as needed using metal shears, ensuring corners and joints overlap by at least two inches. This prevents water from seeping through.
Step 4: Installing Along the Eaves
Along the eaves, set the drip edge under the underlayment layer, and secure it in place. This ensures that water flows directly into the gutter.
Step 5: Final Checks
Inspect the entire installation to confirm that all flashing is secured, and no gaps are present.
4. Benefits of Installing a Drip Edge
- Prevents water damage to the roof deck and fascia.
- Protects the underlying structure from wood rot.
- Enhances the aesthetic appeal of the roof.
5. Troubleshooting Common Drip Edge Installation Problems
Problem: Misalignment
If the drip edge is not aligning properly, remove and reposition it. Ensure all pieces are flush with the roof edges.
Problem: Gaps between Pieces
Gaps can cause water leakage. Overlap joints by at least two inches to create a secure barrier.

FAQs
Why is a drip edge important for my roof?
A drip edge is crucial for diverting water away from the roof and fascia, preventing water damage and decay.
Can I install a drip edge without professional help?
Yes, with the right tools and instructions, homeowners can efficiently install a drip edge themselves.
What type of material is best for a drip edge?
Aluminum is commonly used due to its durability and affordability. However, galvanized steel and copper are also suitable options.
This article contains affiliate links. We may earn a commission at no extra cost to you.