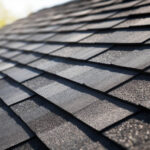
Every homeowner should be well-prepared to deal with potential roof damage, and knowing how to put a tarp on a roof is a vital skill in that preparedness. Roofs are the first line of defense against environmental elements. When roofs are compromised due to severe weather or age, a quick solution to prevent further damage is essential. Here, we’ll explore the detailed steps and techniques to effectively put a tarp on your roof.

Understanding the Importance of Tarping Your Roof
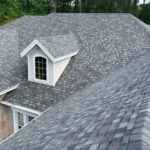
The main purpose of tarping a roof is to provide temporary protection from rain, wind, or debris. A tarp can prevent water from leaking into your home, saving interior walls, furniture, and other belongings from extensive damage. You can find more information on the importance of choosing the right roofing materials in our guide on choosing roofing materials.
Essential Tools and Materials Needed
- Tarp: Choose a tarp large enough to cover damaged areas. Opt for a heavy-duty, waterproof tarp for best results.
- Ropes/Bungee Cords: Used to secure the tarp.
- Nails/Screws: Essential for anchoring the tarp onto the roof.
- Ladder: A stable ladder is a must for reaching your roof safely.
- Hammer/Drill: For nailing or screwing down the tarp.
To know more about securing your home efficiently, explore our article on durable roofing options.
Safety Precautions Before Tarping
Check Weather Conditions
Only attempt tarping when the weather is calm and dry. Wet or windy conditions can make roof work dangerous.
Inspect Your Tools and Gear
Ensure all equipment is in good condition. Wear appropriate gear like slip-resistant shoes and a hard hat to minimize risks.
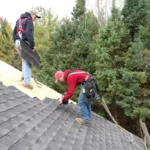
Step-by-Step Guide on Tarping a Roof
Step 1: Assess the Damage
Before starting, ascertain the extent of the roof damage. Visual inspection from the ground can help inform the size of the tarp required.
Step 2: Position the Ladder Safely
Place a sturdy ladder on a flat, stable surface to minimize the risk of falls. Climb up carefully.
Step 3: Cover the Damaged Area
Unroll the tarp across the damaged section, making sure its flat and without creases.
Step 4: Secure with Nails or Screws
Use nails or screws along the tarps edges, ensuring theyre tightly attached to the roofs framework.
Step 5: Ensure a Tight Hold with Ropes
Run ropes or bungee cords over the tarp and secure them to stabilizing points like trees or heavy objects on the ground.
Consult Experts for Severe Damage
If the damage is extensive or complicated, its wise to consult roofing professionals. Visit our detailed guide about selecting a roofing company for more help.
Maintaining Your Tarp
Check the tarp regularly for wear and tear, especially after storms or heavy winds. Promptly replace a damaged tarp.
Conclusion: The Big Benefits of Quick Action
By proactively learning how to put a tarp on a roof, homeowners can safeguard their homes against costly water damage. With some basic tools and a bit of courage, you can manage minor roof damages until professional help arrives. Further, for understanding the cost implications of roof replacements, you may refer to these articles from Forbes and This Old House.

Frequently Asked Questions
Can I tarp a roof myself?
Yes, with the right tools and precautions, you can tarp a roof yourself. However, for extensive damage, contacting professionals is advised.
How long can I leave a tarp on my roof?
A tarp can be left on a roof for several weeks, but it should be regularly evaluated for damage during this period.
What size tarp should I use?
The tarp should extend several feet beyond the damaged area to ensure complete protection and secure anchoring. Measure the area beforehand for accuracy.
This article contains affiliate links. We may earn a commission at no extra cost to you.