When it comes to ensuring the durability and longevity of your home’s roof, understanding how to install flashing on a roof is paramount. Flashing plays a vital role in protecting your home from water damage by sealing the junctions where the roof meets other surfaces. This comprehensive guide provides insights into the installation process of roof flashing for homeowners seeking a blend of security and aesthetics.

What is Roof Flashing and Its Importance?
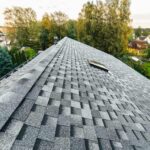
Roof flashing is a thin material, usually made of metal, that is installed at joints or intersections on a roof to prevent water seepage. It is an indispensable element designed to redirect water away from critical areas like chimneys, vents, and valleys, thereby preventing leaks and costly damages.
Types of Roof Flashing
- Continuous Flashing – Also known as apron flashing, it provides a single, long piece of flashing to protect joints.
- Base Flashing – Requires two pieces to handle flashing around moving entities, such as a chimney.
- Counter Flashing – Positioned opposite to base flashing to direct water away.
- Step Flashing – Used for walls and roofs adjoining each other, shaped in steps to guide water.
- Valleys – Placed at the intersection of two roof planes to divert water running down the roof.
How to Install Flashing on a Roof: Step-by-Step Guide
Tools and Materials Needed
- Measuring Tape
- Tin Snips
- Hammer and Nails
- Roofing Cement
- Ladder
- Flashing Material
Preparing for Installation
Before the flashing installation begins, ensure that all materials are gathered, and the work area is stabilized for safety. Inspect the roof thoroughly to identify areas that need flashing, which are usually joints or intersections.
Measuring and Cutting Flashing
Use a measuring tape to measure the length needed for the flashing. Carefully use tin snips to cut the flashing to size. Precision in cutting is crucial as it ensures a snug fit and prevents water penetration.
Installing Continuous Flashing
Place continuous flashing beneath the shingles, securing it with nails. Overlap edges to ensure no gap remains for water to enter. Add roofing cement along the edges for additional sealing.
Installing Step Flashing
Place step flashing at the junction of the roof and wall, interlocking each step with the shingles above and below it. Ensure each piece overlaps the previous one to create a water-tight seal.
Challenges in Installing Roof Flashing
Several challenges exist in installing roof flashing. Misjudgment in measurements, insufficient material overlap, and poor sealing could compromise the roof’s integrity. Thus, a cautious approach and attention to detail are recommended.
Maintenance Tips for Roof Flashing
Regular inspections of your roof flashing are crucial for early detection of wear and potential issues. This practice will help identify rust spots or damaged areas that require immediate attention to avoid water damage.
Regular Inspections
Perform routine roof checks at least twice a year and after major storms. Look for signs of corrosion, detachment, or other forms of damage in the flashing that might need repair.
Timely Repairs
Address minor damages promptly rather than delaying repairs, which might lead to severe water damage and more extensive repairs later.
Professional Roofing Services
If the task of installing or maintaining flashing seems daunting, consider hiring a professional roofing service. Expert roofers offer extensive experience and provide a guarantee for the job done, ensuring peace of mind and optimal protection for your home.
Visit our roof construction guide to evaluate top roofing companies.
The Role of Modern Technology in Roofing Solutions
Modern technology has revolutionized roof installation and maintenance, offering advanced tools and materials that enhance durability and efficiency.
To learn more about modern roofing solutions, check out information on keys to thriving roofing roofing materials.
For in-depth guidance on roofing costs, explore this external resource.

FAQs on Roof Flashing Installation
What type of flashing is best for a new roof installation?
The type of flashing will depend on the specific areas of your roof. Base and counter flashing are commonly used around chimneys and other stationary fixtures, while step flashing is ideal for roof-to-wall intersections.
Is it necessary to replace flashing when getting a new roof?
Yes, it is recommended to replace flashing during a new roof installation to ensure maximum efficiency and avoid future leaks.
How long does installed roof flashing last?
Properly installed roof flashing can last anywhere between 10 to 20 years, depending on the materials used and maintenance practices.
This article contains affiliate links. We may earn a commission at no extra cost to you.