As a homeowner, ensuring the safety and efficiency of your home is paramount. One overlooked yet crucial task is understanding how to clean dryer vent on roof. Proper cleaning not only maintains your dryer’s efficiency but also mitigates potential fire hazards.
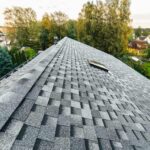
For those unfamiliar, a dryer vent on the roof is a critical component in the drying process. It ensures that the heat and moisture from your dryer are expelled out of your home. But over time, these vents can become clogged with lint and debris.

Why Cleaning Dryer Vents is Important
Cleaning dryer vents is not just about keeping your dryer running efficiently. It’s about ensuring that your home remains safe from potential fires. According to the National Fire Protection Association, thousands of dryer fires occur each year due to clogged vents.
Understanding the Risks of Clogged Dryer Vents
When a dryer vent is clogged, it can cause your dryer to overheat. This not only increases energy consumption but also poses a risk of fire. Regular maintenance and cleaning can prevent these issues, ensuring your home remains safe and your dryer operates efficiently.
How to Identify If Your Dryer Vent Needs Cleaning
Recognizing the signs of a clogged dryer vent is crucial. Here are a few indicators:
- Your clothes are taking longer to dry than usual.
- The dryer feels hotter than normal to the touch.
- The laundry room becomes more humid during operation.
- You notice a burning smell while the dryer is in use.
Tools You Need for Cleaning
Before you begin, make sure you have the necessary tools. Typically, you’ll need:
- A dryer vent cleaning kit with brushes.
- A vacuum with a hose attachment.
- Safety gear: gloves, goggles, and a mask.
- A drill (if your vent brush is compatible).
Steps to Clean a Dryer Vent on the Roof
Here’s a simple step-by-step guide:
- Turn off your dryer and unplug it for safety.
- Access your roof safely, using a sturdy ladder or professional help.
- Remove the vent cover carefully.
- Insert the brush into the vent and gently scrub away any debris.
- Use the vacuum to remove loosened lint.
- Finally, reattach the vent cover securely.
For more comprehensive instructions and illustrations, check resources like NerdWallet.
Tips for Maintaining Clean Dryer Vents
Regular maintenance is key to preventing blockages:
- Regular inspections: Check your vent frequently for signs of blockage.
- Prompt cleaning: Clean your vent quarterly or bi-annually based on usage.
- Monitor dryer performance: Always be on the lookout for signs of inefficient drying.
For organizing roof maintenance, our article on choose construction companies offers valuable insights.
Common Mistakes to Avoid
Avoid these mistakes when cleaning:
- Using the wrong tools, which can damage your vent system.
- Ignoring regular maintenance schedules.
- Not turning off the dryer before starting.
- Attempting to clean it without proper safety equipment.
Should You DIY or Hire a Professional?
While cleaning a dryer vent is manageable, hiring a professional can ensure thoroughness. For those with less experience or those uncomfortable with heights, professional assistance might be the best choice.
Conclusion
Understanding how to clean dryer vent on roof is essential for every homeowner. Regular cleaning prevents safety hazards and promotes energy efficiency. By integrating these cleaning habits, you can ensure a safe and efficient household for years to come.
For additional roofing insights, explore our guide on epdm roofing guide.

FAQs
Is it safe to clean the dryer vent myself?
Yes, with the right tools and precautions. Ensure you understand the process and always prioritize safety.
How often should I clean my dryer vent?
Clean your dryer vent at least once every six months, or more frequently if you use your dryer often.
What are the dangers of not cleaning a dryer vent?
Neglecting dryer vent cleaning can lead to decreased efficiency, higher energy bills, and increased fire risks.
This article contains affiliate links. We may earn a commission at no extra cost to you.