Venting a dryer through the roof can be a terrific solution for homes where side venting is not an option. It’s here where modern technology and building materials make the task much more accessible to homeowners. Understanding how to vent a dryer through the roof is essential for improving the efficiency of your dryer and maintaining safety in your home.
In this big guide, we will discuss the step-by-step process of roof dryer venting, all while ensuring that you follow the necessary safety measures and use the right materials.

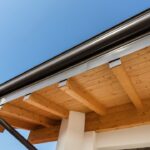
Why Roof Venting is Tremendous for Your Dryer
Roof venting offers a viable option for homes with limited space on exterior walls. It’s especially common in urban areas with adjacent buildings where side venting isn’t feasible. Roof venting eliminates excess moisture and lint, preventing it from creating a hazardous environment.
Approved Methods of Roof Venting
It’s crucial to use approved roof venting methods that are compliant with local building codes and standards. This ensures that the vent does not compromise the integrity of the roof and avoids fire hazards.
Big Technology Impact on Dryer Venting
Innovations in venting technology have made the process more efficient and safer. Today, homeowners have access to advanced materials and techniques that simplify installation while enhancing performance.
Modern Tools and Materials
Using the right tools and materials is key to successful roof venting. From durable vent caps to flexible ducting, understanding the big technology behind these components will help ensure a successful installation.
The Step-by-Step Process
Preparation
Before you begin, gather all necessary tools and materials. This includes vent kits, screws, a drill, a saw, and roofing sealant. Ensure you have the appropriate safety gear, such as goggles and gloves.
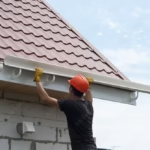
Installation Steps
- Identify the shortest and most direct route to the roof to minimize strain on your dryer.
- Cut a suitable-sized hole using a saw where the vent will be installed.
- Install the ductwork within the attic, securing it with brackets or straps to prevent sagging.
- Attach the vent cap on the roof, ensuring it is properly sealed to prevent leaks.
- Connect the dryer to the vent duct within the house, and secure all joints with tape.
Important Considerations
Local Building Codes
Always check with your local building authority to ensure that your dryer vent installation complies with applicable codes and regulations. Non-compliance could lead to fines or issues when selling your home.
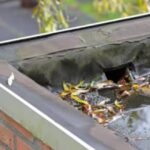
Regular Maintenance
To maintain a safe and efficient dryer vent system, regular cleaning and inspection are necessary. This helps in removing lint buildup that could potentially cause a fire hazard.
Alternative Venting Options
If roof venting is not practical for your home, consider alternatives such as side wall venting or attic ventilation design adjustments.
Key Challenges and Solutions
Common challenges include navigating attic spaces, dealing with multiple pitches in the roof, and preventing lint buildup. Solutions involve using high-quality duct materials and a thorough understanding of house roofing material choices.

FAQs
What if I encounter roof leaks after installation?
If you encounter roof leaks, check the seal around the vent and install flashing if necessary. A housing sealant might also be required to prevent water leakage.
How often should I clean my dryer vent?
It’s recommended to clean the dryer vent every six months to prevent fires and maintain dryer efficiency.
Is professional installation recommended?
While it’s possible to vent a dryer through the roof yourself, hiring a professional ensures that all safety requirements are met and that the job is completed correctly.
You can find more tips and information about DIY home projects over at Rated People. Feel empowered and use these guidelines to safely vent your dryer through the roof, taking advantage of big technology advancements in home improvement.
This article contains affiliate links. We may earn a commission at no extra cost to you.