When planning considerable changes to your home, knowing how to tie in a roof to an existing roof is crucial for maintaining the structure’s integrity and aesthetic appeal. This process involves several critical steps designed to ensure that your new addition not only provides the extra space you need but also blends seamlessly with the existing roof structure. Whether you’re adding a garage, porch, or any extension, the principles remain the same.
First, it is essential to consider the design and style of the existing roof. A proper integration ensures the stability and appearance of your home aren’t compromised. Choosing the right type of roof tie-in can also improve your home’s value and functionality. This article will walk you through the required steps and considerations for this task, addressing what you need to know and what professionals recommend to DIY enthusiasts.

Why Proper Roof Integration Matters
Before diving into the specifics on how to tie in a roof to an existing roof, it’s vital to understand why proper integration matters. Apart from the obvious aesthetic factors, there are structural reasons that imply the necessity of a seamless roof transition. Missteps in this process can lead to leaks, potential roof collapses, and expensive repair bills down the line.
Additionally, the quality of roof integration can affect the energy efficiency of your home. Properly sealed connections help to prevent drafts and maintain consistent indoor temperatures, reducing heating and cooling costs.
Steps To Tie In A Roof
Planning and Design
The first step is meticulous planning and design. This phase includes evaluating your existing structure and planning for consistency in slope and materials. You’ll want to match as closely as possible the existing pitch and the roofing materials such as shingles or tiles.
Structural Assessments
Perform a thorough structural assessment to ensure your current roof can handle the additional load from the new structure. Calculate the size of rafters and trusses required, and ensure they are compatible with the existing roof frame.
Working with an experienced architect or a structural engineer can be beneficial in this phase, as it helps to address any potential issues early on.
Obtaining Necessary Permits
Any significant construction project requires the proper approvals and permits from local authorities. Ensure that you are compliant with local building codes and regulations. Failure to adhere could lead to costly fines or forced removal of the structure.
Prepare the Area
Begin by determining where the new roof will connect with the existing one. Carefully remove existing roofing material where necessary to expose the underlayment and rafters. It’s critical to handle this stage delicately to prevent damage to the current structure.
Joining the New Roof
Use a chalk line to mark where the new roof will connect. Install the new rafters or trusses by ensuring they extend securely into the existing roofs structure. Use metal connectors for additional strength on exposed areas.
Important Considerations
Weatherproofing
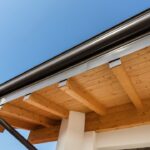
Integrate new flashing and sealants to protect against leaks and water damage. This step is crucial as improper sealing is a common issue leading to water intrusion.
Ventilation
Maintain proper ventilation by including vents in the design to ensure adequate airflow and prevent moisture build-up, which can lead to mold and decay.
Common Mistakes to Avoid
- Unmatched Materials: Always ensure that you select materials that are an exact match to maintain the homes exterior aesthetics.
- Ignoring Building Codes: Strict adherence to local building codes cannot be overstated. Not only is it unlawful to ignore them, but it also poses safety risks.
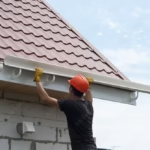
Professional Assistance
Highly complex roof integrations should ideally be performed by professionals. While DIY is admirable, the risks associated with improper installation might justify the cost of hiring experienced roofers.
For further guidance, consider visiting this Forbes article to understand potential costs associated with roof modifications.
Relevant Tools and Materials
Make sure you have all the necessary materials and tools on hand. This may include roof joist hangers, flashing, chalk lines, a hammer, and appropriate roof shingles or tiles.
Additional Resources

FAQs
Can I Tie in a New Roof to an Existing Structure Myself?
Yes, a DIY approach is possible for those with experience, but professional consultation is advisable to ensure structural integrity.
What Tools Do I Need?
Basic construction tools such as hammers, nails, joist hangers, chalk lines, and appropriate flashing are important for this task.
Do I Need Specific Permits?
Acquiring the proper permits is crucial before initiating your project. Always check with local authorities to ensure compliance.
Tying in a new roof to an existing structure is a significant endeavor, but with meticulous planning and attention to detail, it leads to a rewarding outcome that enhances both the space and value of your home.
This article contains affiliate links. We may earn a commission at no extra cost to you.