Introduction to Roof Flashing
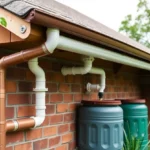
Installing roof flashing is a crucial step in maintaining the integrity of your roof. Whether you’re embarking on a new project or repairing an existing roof, understanding how to install roof flashing against a wall will save you time and costly repairs in the future. Roof flashing directs the flow of water away from certain areas of your roof, particularly where the roof meets a wall or chimney.
Why Is Roof Flashing Important?
Flashing is essential for preventing water from seeping into your home, which could lead to rot, mold, and structural damage. Properly installed flashing will effectively divert water away and ensure a longer lifespan for your roof. For more information on potential roof damage, check out our guide on insurance and wind damage.
Types of Roof Flashing
Understanding the different types of flashing, such as step flashing and continuous flashing, will help you choose the best option for your specific roofing needs.
Materials Needed for Installation
Before you begin, gather the necessary materials which include metal flashing, roofing nails, caulk, and a hammer. You may also need a ladder, measuring tape, and tin snips. If you’re questioning your capabilities or need clarification, ask yourself if a permit is needed.
Step-by-Step Installation Guide
1. Prepare the Surface
Start by cleaning the area where you’ll install the flashing. Remove debris, old caulk, and ensure the surface is dry.
2. Cut and Bend the Flashing
Measure the length needed and use tin snips to cut the metal flashing. Bend the flashing’s edges to fit tightly against the wall.
3. Install the Base Flashing
Nail the base flashing against the wall starting from the bottom edge, and ensure it’s level.
4. Seal the Seam
Apply a line of caulk along the edge where the flashing meets the wall to seal any gaps.
5. Attach the Step Flashing
Overlap the step flashing above the base flashing. Secure it with nails and apply caulk as needed. For more insight on roofing, read about roof replacement timelines.
Common Mistakes to Avoid
Ensure corners are tight, and do not overlap flashing improperly as it can lead to leaks. For comprehensive mistakes to avoid, consult Angi’s roofing cost guide.
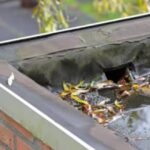
Maintenance Tips
Regularly inspect your flashing for signs of rust or gaps. Annual maintenance will help preserve its condition.
When to Call a Professional?
If you’re uncertain about your installation or encounter issues such as persistent leaks, it may be time to consult a professional.
Conclusion
Installing roof flashing against a wall is a fundamental part of home maintenance that, when done correctly, safeguards your home from potential water damage. Its a terrific way to ensure your homes longevity.

FAQs
What tools are needed for installing roof flashing?
Essential tools include roofing nails, a hammer, caulk, and tin snips.
Can old flashing be reused?
While it’s possible, using new flashing is recommended to ensure effectiveness.
How often should flashing be inspected?
Flashing should be inspected annually or after severe weather conditions.
This article contains affiliate links. We may earn a commission at no extra cost to you.