Embarking on a roofing project can be an exciting yet challenging task, especially when it involves installing a metal roof. Whether you’re aiming for aesthetic appeal, longevity, or energy efficiency, a metal roof often checks all these boxes. This comprehensive guide will not only walk you through the key steps on how to install a metal roof but also share some insider tips that make the process smoother and more efficient.

1. Understanding the Benefits of Metal Roofs
Before diving into the nuts and bolts of installation, it’s essential to appreciate why metal roofs are gaining popularity. Not only are they durable and weather-resistant, but they also add a sleek, modern look to any home. Unlike traditional shingles, metal roofs require little maintenance, are energy efficient, and can last a tremendous 40 to 70 years.
Maintenance and Longevity
The life expectancy of metal roofs is often double or triple that of asphalt shingles. Their durability makes them a smart investment for homeowners looking to reduce long-term maintenance costs. For more on the longevity of roofs, explore this article.
Environmental and Energy Benefits
Metal roofs are not only recyclable but also aid in reducing energy bills due to their reflective properties. They are designed to reflect heat rather than absorb it, making them ideal for reducing air conditioning costs during summer.
2. Gathering Necessary Tools and Materials
Proper preparation is key to any successful DIY project. Heres a list of tools and materials youll need:
- Metal roofing panels
- Underlayment
- Closure strips
- Panels and trim
- Nails and screws
- Hammer
- Drill and bits
- Measuring tape
- Safety gear (gloves, goggles, harness)
3. Ensuring Safety Precautions
Safety should never be compromised. Always use the correct ladders and harnesses when working on roofs. Make sure your workspace is secure and all tools are in good condition.
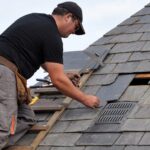
4. Preparing the Roof Surface
Before installing anything, it is crucial to prepare the roof surface. This involves cleaning any debris, ensuring a smooth surface, and making necessary repairs. A clean and stable base will ensure the effectiveness and longevity of your metal roof.
Underlayment Installation
Installing an appropriate underlayment is critical to protecting your home from water and ice damage. Ensure it is laid down smoothly with no wrinkles or folds.
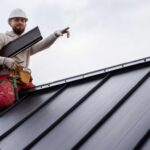
5. Installing the Metal Roof Panels
Begin by aligning the first panel with the roof edge, ensuring it overlaps onto the gutters to direct water flow. Secure the panels using suitable nails or screws, ensuring a uniform setup and secure attachment.
Ensuring Proper Overlap
Overlapping the panels correctly prevents leaks and ensures structural integrity. Each panel should overlay the previous one by at least 2-4 inches.
6. Fitting Closure Strips and Trim
Closure strips are essential for weather-tight seals and should be applied under every row of metal panels. Trim work is the final touch to ensure that edges are neat and functional, preventing water intrusion.
Sealing and Fastening
Seal and fasten all joints and corners securely. This will prevent water leaks and protect your roof against strong winds.
7. Inspecting Your Work
After installation, inspect your work carefully. Check all fasteners, ensure no gaps, and that flashing is correctly installed. This final check can save a lot of hassle down the line.

FAQs
How long does it typically take to install a metal roof?
Installation timelines can vary, but a standard metal roof might take two to three days for an average-sized home.
Do I need a permit for roof installation?
Yes, most places require a permit for DIY roofing. Please check your local regulations. For more information, visit this link.
Will a metal roof increase my home insurance?
Possibly. Metal roofs can lower your home insurance premium due to their durability and fire resistance. Consult with your insurance provider for details.
For more insights into roofing costs and considerations, consider reading this resource.
Conclusion
Installing a metal roof can be a life-changing upgrade for your home. Not only does it offer protection and durability, but the investment also adds to your home’s efficiency and value. With this guide, you’re well-equipped to tackle this exciting project with confidence.
This article contains affiliate links. We may earn a commission at no extra cost to you.