Maintaining a clean and sturdy roof is vital for every homeowner. One of the challenges in roof maintenance is the issue of moss growth. Understanding the roof moss removal dos and don’ts is crucial to ensuring the longevity and safety of your home. In this article, we’ll delve into the best practices for removing moss from your roof while avoiding common pitfalls.

Understanding Roof Moss
Moss is a small, flowerless plant that thrives in damp, shaded environments. When it comes to roofs, moss can wreak havoc. It can damage shingles, cause leaks, and even reduce the lifespan of your roof if not properly managed.
Why Is Moss a Problem?
Moss can hold moisture against the roof surface, leading to potential water damage. This moisture can cause shingles to deteriorate faster, leading to costly repairs. Additionally, moss can lift shingles, allowing rainwater to seep underneath and cause leaks.
Dos of Roof Moss Removal
1. Do Regular Inspections
Regular inspections are essential. Check your roof at least twice a year for signs of moss growth. Early detection can make removal easier and prevent further damage.
2. Do Use Safe Cleaning Solutions
Opt for environmentally-friendly cleaning solutions specifically designed for moss removal. These solutions are effective without causing harm to your roof or the environment.
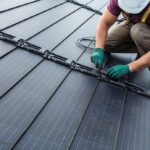
3. Do Hire Professionals
Consider hiring professionals for professional cleaning. They have the expertise and equipment to safely remove moss without damaging your roof.
4. Do Protect Your Roof Post-Removal
After removing moss, take preventive measures to protect your roof. This includes installing zinc or copper strips that prevent moss growth. For more tips on post-removal care, check out roof maintenance.
Don’ts of Roof Moss Removal
1. Don’t Use Harsh Chemicals
Avoid using bleach or other harsh chemicals as they can damage your roof and harm the environment. Opt for safe, non-toxic alternatives.
2. Don’t Use High-Pressure Washing
Never use high-pressure washing to remove moss. It can strip away shingles and cause significant damage to your roof.
3. Don’t Ignore the Problem
Ignoring moss growth can lead to severe roof damage. Address the issue promptly to avoid costly repairs down the line.
Preventing Roof Moss
1. Trim Overhanging Branches
Ensure that branches are trimmed back to allow sunlight to reach your roof. Sunlight can help prevent the damp conditions that moss thrives in.
2. Improve Roof Ventilation
Proper roof ventilation can help keep your roof dry and reduce the likelihood of moss growth. Ensure your attic is well-ventilated to promote airflow.
3. Regular Cleaning
Regularly clean your roof to remove debris that can hold moisture and encourage moss growth. A clean roof is less likely to develop moss.
When to Call a Professional
If you’re unsure about removing moss yourself, or if you notice extensive damage, it’s best to call a professional. They can assess the situation and provide the best solution for your roof.
Conclusion
Understanding the roof moss removal dos and don’ts is essential for every homeowner. By following these guidelines, you can ensure your roof remains in excellent condition and avoid costly repairs. Regular inspections, safe cleaning methods, and preventive measures are key to keeping your roof moss-free.

FAQs
1. Can I use vinegar to remove moss?
Yes, vinegar can be an effective natural solution for removing moss. Mix it with water and apply it to the affected areas.
2. How often should I check my roof for moss?
It’s recommended to inspect your roof at least twice a year, in the spring and fall, to catch any early signs of moss growth.
3. Is moss harmful to my roof?
Yes, moss can damage shingles, cause leaks, and shorten your roof’s lifespan if not addressed promptly. For more information on the impact of moss, visit this external source.
This article contains affiliate links. We may earn a commission at no extra cost to you.