Maintaining a healthy and safe home involves many tasks, but one often overlooked aspect is the presence of moss on your roof. In this roof moss annual inspection guide, we’ll provide you with the knowledge and tools necessary to protect your home from potential damage caused by moss. Homeowners, take note: regular inspections are key to preserving the integrity of your roof and, ultimately, your home.
Moss thrives in damp and shaded environments, making rooftops particularly susceptible, especially in regions with high humidity and frequent rainfall. Left unchecked, moss can cause significant damage over time. An annual inspection is not only a preventative measure but also a cost-effective way to avoid extensive repairs.

Understanding Roof Moss
Moss may appear harmless, but it can lead to severe issues if left untreated. This small plant can retain moisture, which can seep into roofing materials, leading to decay and corrosion. Understanding the potential risks associated with moss growth is the first step towards effective prevention.
Why Moss Grows on Roofs
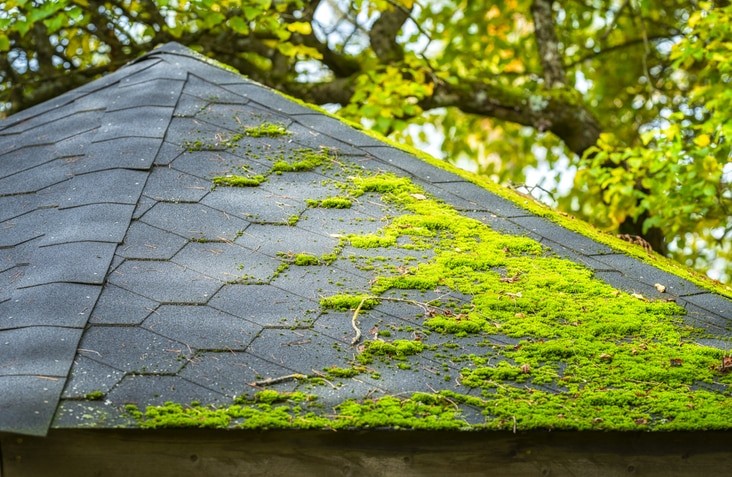
Moss tends to grow in areas that are consistently damp and shaded, such as the north-facing slopes of roofs or those under tree cover. The moisture retained by moss can exacerbate the deterioration of roofing materials, making it essential to address any growth promptly.
The Impact of Moss on Roofing Materials
Moss can cause shingles to lift, which allows water to seep underneath, leading to leaks and water damage. Over time, this can compromise the structural integrity of your roof. Regular inspections help identify these issues before they become severe.
The Importance of Regular Inspections
Performing an annual inspection allows you to catch any signs of moss growth early, preventing costly repairs and extending the life of your roof. Consider scheduling your inspection during the spring or fall when weather conditions are mild.
Signs of Moss Growth to Watch For
During your inspection, look for any visible signs of moss, such as green patches or discolored shingles. It’s also important to check for any areas of your roof that are consistently shaded or damp, as these are prime locations for moss growth.
Tools and Equipment Needed
Ensure you have the right tools on hand for your inspection. A sturdy ladder, safety gear, and a soft brush for removing moss are essential. For more comprehensive guidance, visit the Roof Moss Safety Checklist.
Steps to Conduct an Annual Roof Moss Inspection
Conducting a thorough inspection involves several steps to ensure no aspect of your roof is overlooked.
Step 1: Safety First
Before climbing onto your roof, ensure you have the necessary safety gear, including non-slip shoes and a harness if needed. Safety should always be your top priority.
Step 2: Visual Inspection
Carefully examine your roof for visible signs of moss, mold, or algae. Pay attention to shaded areas and look for any damaged or missing shingles. For more tips on what to look for, see our Roof Moss in Coastal Climates guide.
Step 3: Gutter Check
Moss can accumulate in gutters, leading to blockages and water damage. Ensure your gutters are clear and functioning correctly.
Step 4: Addressing Moss Growth
If you find moss growth, use a soft brush to gently remove it, being careful not to damage the shingles. For larger infestations, consider contacting a professional or reviewing our guide on removing moss from roofs.
Prevention and Maintenance
Prevention is the best defense against roof moss. Implementing a few simple maintenance strategies can significantly reduce the likelihood of moss growth.
Trim Overhanging Branches
Ensure trees around your home are trimmed back to prevent excessive shading and moisture on your roof. This simple step can make a significant difference.
Regular Roof Cleaning
Incorporate regular roof cleaning into your maintenance routine. This helps remove debris and prevent moss from establishing a foothold. For more cleaning tips, refer to our Roof Moss Removal Dos and Don’ts.
Install Zinc or Copper Strips
Consider installing zinc or copper strips along the ridge of your roof. These metals are toxic to moss and can help prevent its growth.
When to Call a Professional
While many homeowners can perform basic inspections and maintenance, there are times when professional intervention is necessary.
Severe Moss Infestations
If you discover extensive moss growth, it’s best to contact a professional to assess the damage and recommend appropriate solutions. For budget-friendly options, explore our Roof Moss DIY Budget Tips.
Structural Damage Concerns
If you suspect that moss has caused structural damage to your roof, a professional inspection is crucial to assess the extent of the damage and recommend necessary repairs.
Conclusion
Regularly inspecting your roof for moss is a proactive step in maintaining your home’s integrity. By following this roof moss annual inspection guide, you can prevent significant damage and extend the life of your roof. Remember, prevention and early intervention are key to protecting your home from the risks associated with moss.

FAQs
How often should I inspect my roof for moss?
It’s recommended to perform an inspection at least once a year, ideally in the spring or fall.
Can I remove moss myself?
Yes, small patches can be removed with a soft brush. For larger infestations, professional help may be required.
What are the risks of not removing roof moss?
Unaddressed moss can lead to water damage, leaks, and structural issues, potentially resulting in costly repairs.
This article contains affiliate links. We may earn a commission at no extra cost to you.