


Properly evaluating the condition of your attic’s insulation is one of the most effective steps you can take to improve your home’s energy efficiency and comfort. Many homeowners overlook this critical area, assuming their insulation is performing as intended. However, a careful inspection can reveal hidden issues such as gaps, compression, moisture damage, or outdated materials—problems that can lead to higher energy bills and uncomfortable indoor temperatures.
This guide provides a clear, step-by-step approach to how to inspect attic insulation safely and thoroughly. Whether you’re preparing for a renovation, troubleshooting drafts, or simply want to ensure your home is well-protected, understanding what to look for in your attic can help you make informed decisions about upgrades or repairs. For those interested in the broader impact, you may also want to learn about how attic insulation improves home value and why regular assessments matter.
Why Regular Attic Insulation Checks Matter
Many factors can degrade insulation over time, including moisture intrusion, pest activity, and simple aging. When insulation is compromised, it loses its ability to resist heat flow, making your HVAC system work harder and increasing your utility costs. Regularly reviewing your attic’s insulation helps you catch these issues early, preventing costly repairs and maintaining a comfortable living environment.
In addition to energy savings, well-maintained insulation can contribute to better indoor air quality and even extend the lifespan of your roof and attic structure. If you live in a newer property, you might also find it useful to explore attic insulation for new homes to understand modern standards and materials.
Preparing for a Safe and Effective Attic Inspection
Before entering your attic, gather the necessary safety gear and tools. Attics can be dusty, cramped, and sometimes hazardous due to exposed nails, low headroom, or unstable joists. Here’s what you’ll need:
- Protective clothing (long sleeves, pants, gloves)
- Dust mask or respirator to avoid inhaling particles
- Safety goggles for eye protection
- Flashlight or headlamp for visibility
- Measuring tape to check insulation depth
- Notepad or smartphone for documenting findings
Always step only on joists or walk boards to avoid damaging the ceiling below. If your attic is unfinished, be especially cautious to prevent falls or injuries.
Key Steps in Assessing Your Attic’s Insulation
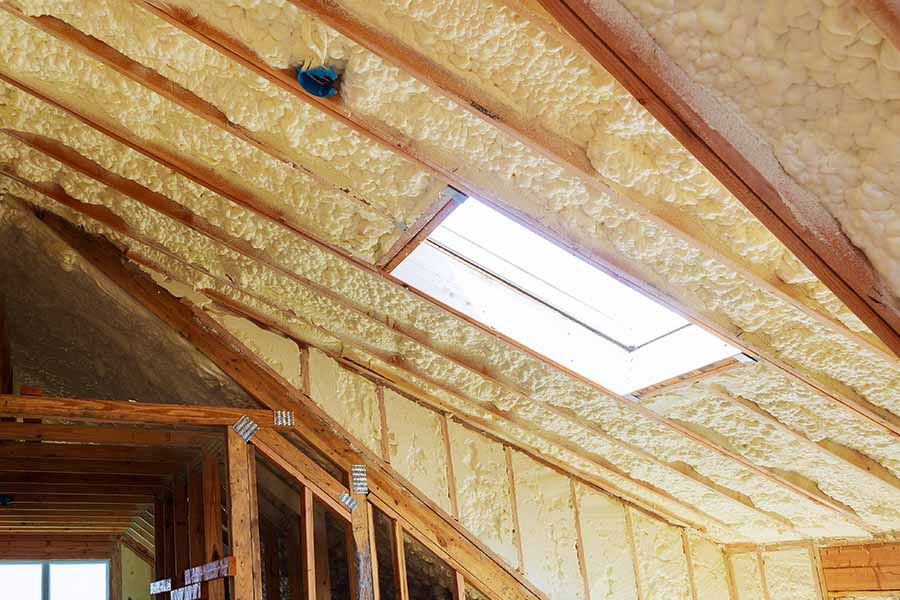
1. Identify the Type of Insulation Present
Start by determining which material is installed. Common types include fiberglass batts, blown-in cellulose, spray foam, and mineral wool. Each has unique characteristics and potential issues. For a deeper understanding of specific materials, you can read about how fiberglass insulation works or how spray foam insulation works in attic spaces.
- Fiberglass batts are pink or yellow rolls or blankets.
- Blown-in cellulose looks like loose, grayish fibers.
- Spray foam forms a rigid, yellow or white surface.
- Mineral wool resembles dense, dark batts or loose fill.
2. Measure Insulation Depth and Coverage
Use your measuring tape to check the thickness of the insulation in several locations. Compare your findings to the recommended R-value for your region, which is a measure of thermal resistance. In most climates, attics should have at least R-38 to R-60, which typically means 10–20 inches of material, depending on the type.
Look for areas where insulation is thin, missing, or unevenly distributed. Gaps or compressed spots can significantly reduce effectiveness. If you notice bare joists or inconsistent coverage, it may be time to add more material or redistribute what’s already there.
3. Check for Signs of Moisture or Mold
Moisture is a major enemy of attic insulation. Inspect for any damp spots, water stains, or mold growth on the insulation or roof decking. These issues often indicate roof leaks, poor ventilation, or condensation problems. Addressing moisture promptly is crucial to prevent further damage and protect indoor air quality.

4. Look for Pest Activity and Insulation Damage
Rodents, birds, and insects can disturb or destroy insulation. Check for droppings, nests, chewed materials, or tunnels. Damaged insulation not only loses its insulating properties but can also introduce allergens and contaminants into your home.
5. Evaluate Air Sealing and Ventilation
Even the best insulation won’t perform well if your attic isn’t properly air-sealed and ventilated. Inspect for gaps around plumbing, wiring, or light fixtures that could allow air leaks. Also, verify that soffit, ridge, or gable vents are unobstructed to prevent moisture buildup and maintain healthy airflow.
Common Issues Found During Attic Insulation Reviews
During your assessment, you may encounter several typical problems:
- Settled or compressed insulation that no longer meets recommended depth
- Wet or moldy areas indicating leaks or poor ventilation
- Gaps and voids around edges, corners, or penetrations
- Outdated materials that may not meet current energy codes
- Pest damage or contamination
Addressing these issues promptly can restore your attic’s performance and help you avoid bigger problems down the road. If you’re considering an upgrade, learning about blown-in insulation benefits can help you choose the right solution for your home.
When to Call a Professional
While many homeowners can perform a basic inspection, certain situations call for expert help. If you find extensive mold, structural damage, or are unsure about the type or condition of your insulation, a licensed contractor can provide a detailed assessment and recommend solutions. Professionals also have the tools and experience to safely handle hazardous materials and ensure your attic meets local building codes.
Frequently Asked Questions
How often should I check my attic insulation?
It’s a good idea to review your attic insulation at least once every two to three years, or after any major weather events, roof repairs, or signs of changing indoor comfort. Regular checks help catch problems early and maintain energy efficiency.
What are the signs that my attic insulation needs replacing?
Common indicators include uneven temperatures in your home, rising energy bills, visible gaps or bare spots, signs of moisture or mold, and pest activity. If your insulation is more than 15–20 years old, it may also be time to consider an upgrade.
Can I add new insulation over old material?
In most cases, you can add new insulation on top of existing material as long as it’s dry and free from mold or pests. However, compressed or damaged insulation should be removed or repaired first to ensure optimal performance.
Conclusion
Conducting a thorough attic insulation assessment is a practical way to enhance your home’s energy efficiency, comfort, and value. By following the steps outlined in this article, you can identify issues early and make informed decisions about repairs or upgrades. Remember, regular inspections and prompt attention to problems will keep your attic—and your entire home—in top condition for years to come.


